There's something undeniably magical about ladybugs. Their tiny bodies, vibrant red shells dotted with black, and gentle way of landing on our fingertips have captivated children for generations. It's no wonder these little beetles inspire endless creativity, transforming into adorable DIY decorations, toys, and even wearable delights. Here, we have the DIY Ladybug Crafts suited for all ages and skill levels. There's a perfect way to bring these beloved creatures to life, spreading their cheer and wonder throughout your world.

From classic painted paper plates to 3D origami wonders, show your creativity with vibrant red and black hues. Upcycle everyday items like clothespins, toilet paper rolls, or even stones into charming ladybugs. For a cuddly touch, crochet cozy ladybug plushies or sew finger puppets for imaginative playtime. Want to decorate your garden? Craft stunning ladybug wind chimes or paint paper plates with whimsical bugs. The possibilities are endless!
Apple Stamp Ladybug Craft For Kids

The Apple Stamp Ladybug Craft is an engaging art project for kids, perfect for springtime or learning about insects. The project would be satisfactory because they love to spirit the paints. First, you print and cut out a supplied ladybug head template. Then, paint the apple's cut side and press it onto the cardstock to create a ladybug's body. After drying, add black spots and a line to represent the ladybug's wings. You can craft a leaf from green cardstock with a stem and veins to place your ladybug on. Finish by gluing the head to the body and drawing antennas.
DIY Ladybug Rock Art For Kids

Here is an enjoyable outdoor activity that invites children to express their creativity by painting ladybugs onto rocks. You can make these colorful ladybug rocks, which can be placed in the garden or around the neighborhood to spread joy. The process begins with cleaning the rocks in different sizes and letting them dry before painting them red for the ladybug's body. After the red paint dries, children can add the ladybug's black spots, a vertical line for the wings, and a black head. Eyeballs and antennae are also painted white with a black outline for more detail.
Coffee Filter Ladybug Craft For adults
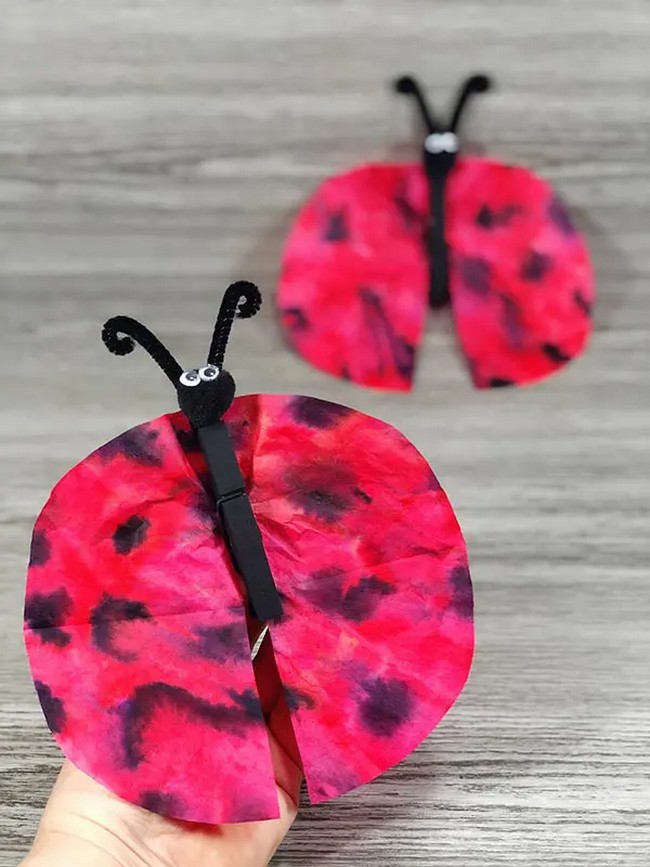
Convert simple household materials into cute ladybugs with this craft idea. It is a fun, educational project that enhances motor skills, encourages creativity, and is an interactive learning tool, perfect for classroom decoration or themed parties. Simply color coffee filters with markers for wings attached to a clothespin with a pom-pom head and chenille stem antennae. Add googly eyes for a fun, educational ladybug craft.
Ladybug Hat Craft

Make a cute ladybug hat with your kids using simple materials and a free printable template available. Start by downloading and printing the template. You can choose to color it or trace it onto colored cardstock. Add legs and boots to your ladybug, then glue on black spots and antennae, and wiggle eyes with a drawn smile for character. Assemble the hat by attaching the legs and spotty wings to a headband, then make it wearable by forming a loop with the headband and securing it with a stapler. Now, your children have a whimsical ladybug hat to wear for summer fun!
Paper Ladybug Craft

Creating a paper ladybug is a delightful, easy craft for kids. It not only stimulates creativity and motor skills, but it also makes a charming decoration or gift. Children can cut shapes for the body, spots, and features with red, black, and white paper, scissors, glue, and a marker and then assemble them into a cute ladybug. It's a fun activity that adds a pop of color and joy wherever it is displayed.
Recycled Cd Ladybug Craft For Kids
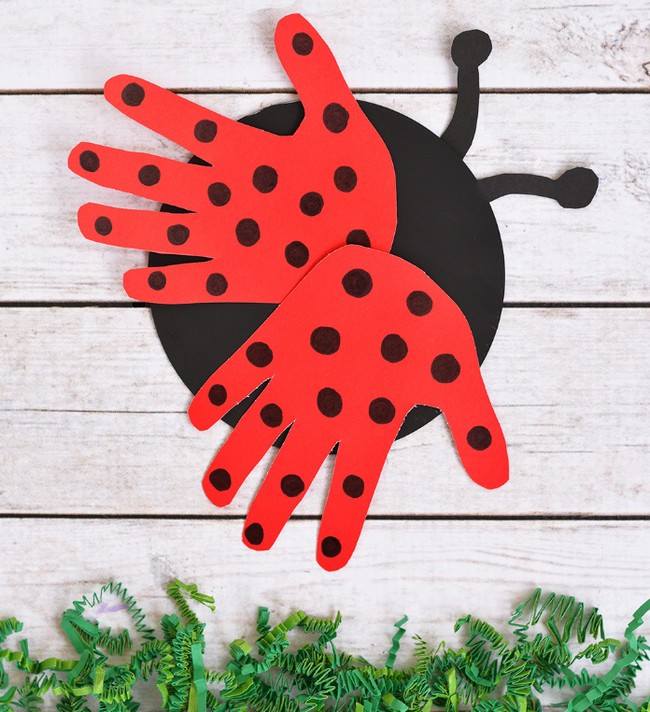
This craft is an inventive way to turn old CDs into vibrant and fun decorations, tying in themes of both recycling and creativity. It is toy also uniquely displayable hang them up, use them as coasters, or add magnets to turn them into decorative fridge art. This craft involves painting an old black CD, cutting and decorating hand-shaped red paper wings, and attaching them with a crafted antenna. It's a fun, eco-friendly activity that repurposes old CDs into cute ladybug decor for home or school.
Toilet Paper Roll Ladybug Craft

Transform a used toilet paper roll into a charming ladybug! Paint or wrap it black, then add red paper wings (cut from a circle). Stick on googly eyes or draw them, and don't forget the black spots! This easy craft uses recycled materials and lets you customize your ladybug with different colors and patterns. Hang it as a decoration, or use it for imaginative play!
Ladybug Craft For Kids
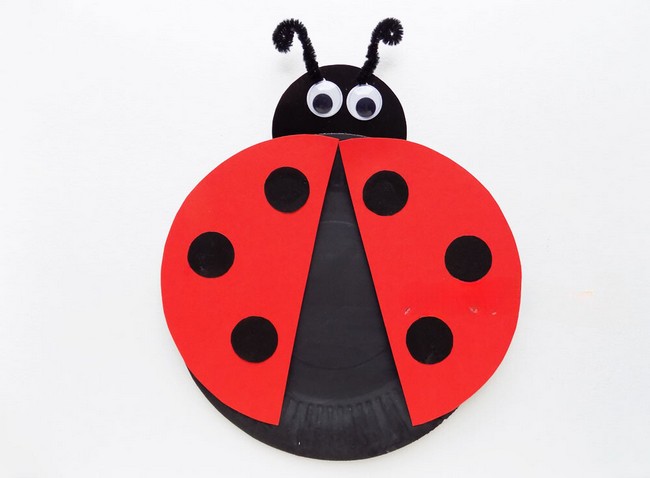
The Paper Plate Ladybug Craft is a simple and engaging DIY project suitable for children. It can be a fun addition to any classroom studying insects or used as a creative at-home activity during vacation time. The project starts with painting the paper plate black, which forms the base for the ladybug. Red and black circles, cut from the cardboard, are used to represent the body and head. Smaller black circles are added for the classic spotted wings of the ladybug, and black pipe cleaners serve as antennae. The craft is finished off with the all-important eyes, giving your ladybug a playful personality.
Handprint Ladybug Craft For Kids

This project is a splendid way to usher and celebrate springtime with kids. It provides a fantastic opportunity for fine motor practice and creativity while also making for an interesting decor or a personalized gift. The process entails tracing the child's hand onto red paper and cutting it out to make the ladybug's wing. At the same time, other parts like the body, legs, eyes, and spots are created from different colored cardstock using the provided template. Final assembly involves sticking all the pieces together to create a cheery handprint ladybug.
Easy Paper Ladybug Craft For preschoolers
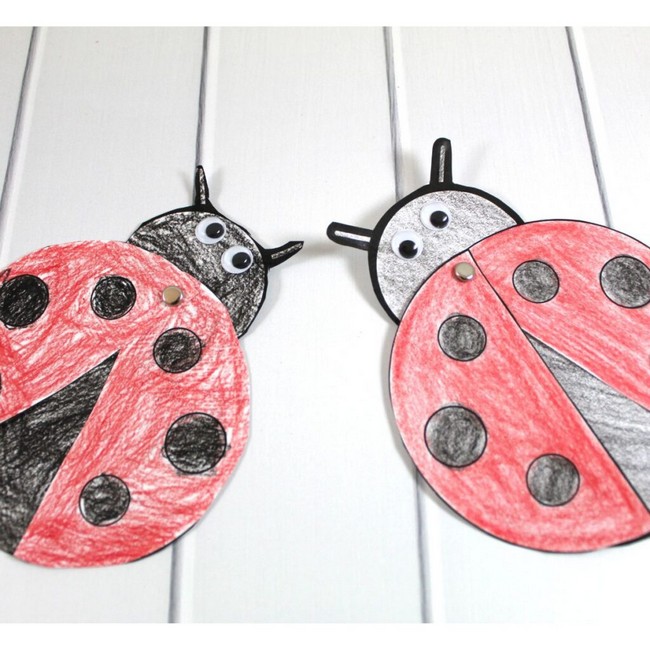
Introduce children to the world of insects by making this ladybug with them. Your child would love coloring the templates given in the below link in different colors. The process involves printing the template, coloring the ladybug parts, cutting them out, and assembling them with a brad to allow the wings to move. This craft offers a fun, creative experience and aids in developing fine motor and scissor skills, plus hand strength and pencil grip through coloring.
Swirling Twirling Ladybugs

These adorable ladybugs are made from construction paper circles (4.5" squares cut and traced). Stack two squares, cut slits, interlock them, and glue on wiggle eyes. Each ladybug has 4 sections for eyes. Easy to make and perfect for summer, they spin and twirl in the breeze, adding a touch of whimsy to your outdoor space.
Easy Paper Plate Ladybug Craft For Preschoolers

Little ones will love making these cute ladybugs! Using red and black paper plates, you cut out wings and body shapes. Add black circles for spots and white paper eyes. Tape or glue everything together, and your friendly ladybug is ready to fly! Perfect for door decorations or playtime fun, this simple craft is great for developing creativity and fine motor skills.